How do I set up my alters in the programs I use?
How do I set up my alters in the programs I use?
And how do templates work?
Under 10 Minute Read.
In this article, we cover how to get started making alters and using our pre-made templates in a variety of programs.
Preparation and Introduction

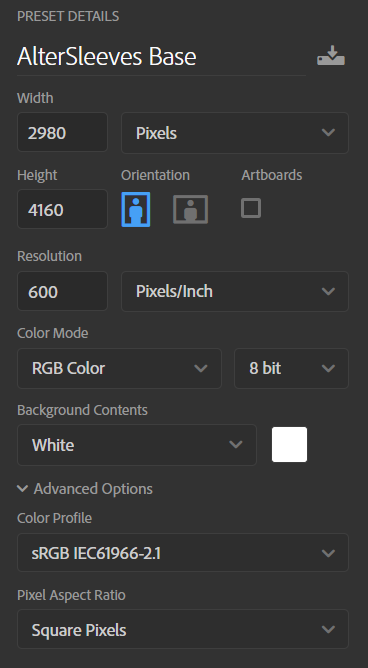
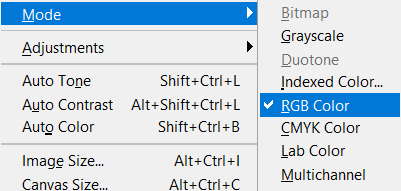
Starting off, it is important to make sure the digital document we are using for creating our sleeves is set up in the proper manner for optimal processing. Turning sleeves into a physical product is not an easy process. To make it easier for us, the artists, we have created this document to make the behind the scenes processing go smoothly. Following this guide will make sure that your Sleeves print out successfully. We would like to ask you to start your design in sRGB. It is recommended and welcomed to use the following link to the current ICC sRGB standard (sRGB v4), especially using this one, which is optimized for use for “screen to print” transitions: http://www.color.org/profiles/srgb_appearance.xalter, to download the profile you have to agree to the terms of use; there is a button to click before the download link appears at the bottom of the page.

Saving this canvas-template preset is recommended, so you don’t have to input the information every time you want to do an alter. Similarly, we also have a google drive folder full of precut and pre-setup templates. You can find these templates here. This tutorial will primarily focus on Photoshop CC2019 but the details, if not the exact steps, should be roughly universal for image editing programs.

Photoshop is Optional.
You do not have to use Photoshop, however, you must use a complex image editing software to prepare sleeves. There are free and open-source alternatives to Photoshop that are also valid to use. In Photoshop, you will see something like the images on the right-hand side. However, if you are using GIMP or Photopea you will need to click new then click advanced settings. You can find more info about free programs like Krita, GIMP, and Photopea on their respective websites. A popular program that a lot of our artists use is Procreate for iOS, this program actually works quite similar to how photoshop does with its layers and masks.
If you are using GIMP, or other non-photoshop programs, you may need to download the ICC profile from above to even have the proper sRGB profile. Procreate already has the most up-to-date sRGB profile.
Program Options?
We assume most of our artists will be using Photoshop, Procreate, or GIMP; as these are standards, but if you are unsure which to choose, go check them all out. Each has pros and cons as well as very different costs.
Most Expensive (subscription!) and Most Powerful, an Industry Icon
Free, Open Source, but a bit cumbersome
Free, Open Source, focused on painting
Free, very powerful but limited to Browsers. A clone of Photoshop
One time purchase, Powerful painting tool, Industry standard
One time purchase, very powerful painting app for iPad
Adobe’s answer to Procreate. There is a free and premium version.
One time purchase, wonderful alternative to Photoshop.
Files will be large!
It should be noted that this will be a very large file, upwards of 1 or 2 GBS, you may need to adjust your settings to accommodate the workload this will put on your computer. Please see Adobe for optimizing Photoshop. For your designs, the DPI doesn’t matter. The pixel-dimensions however do. The size of your design should always be 2980x 4160 pixels. This is critically important as files submitted that are not this size can not be printed. It is possible to design the sleeve in a smaller size than upscale it to match the proper dimensions, however, doing so requires additional steps to complete the sleeve, and as such it is not recommended to do unless you understand how to use image-editing software very well. Designing in half-scale and then resizing the use of a “nearest-neighbor” interpolation to prevent anti-aliasing on the resized pixels can be used to scale art.
Acquiring Scryfall Images
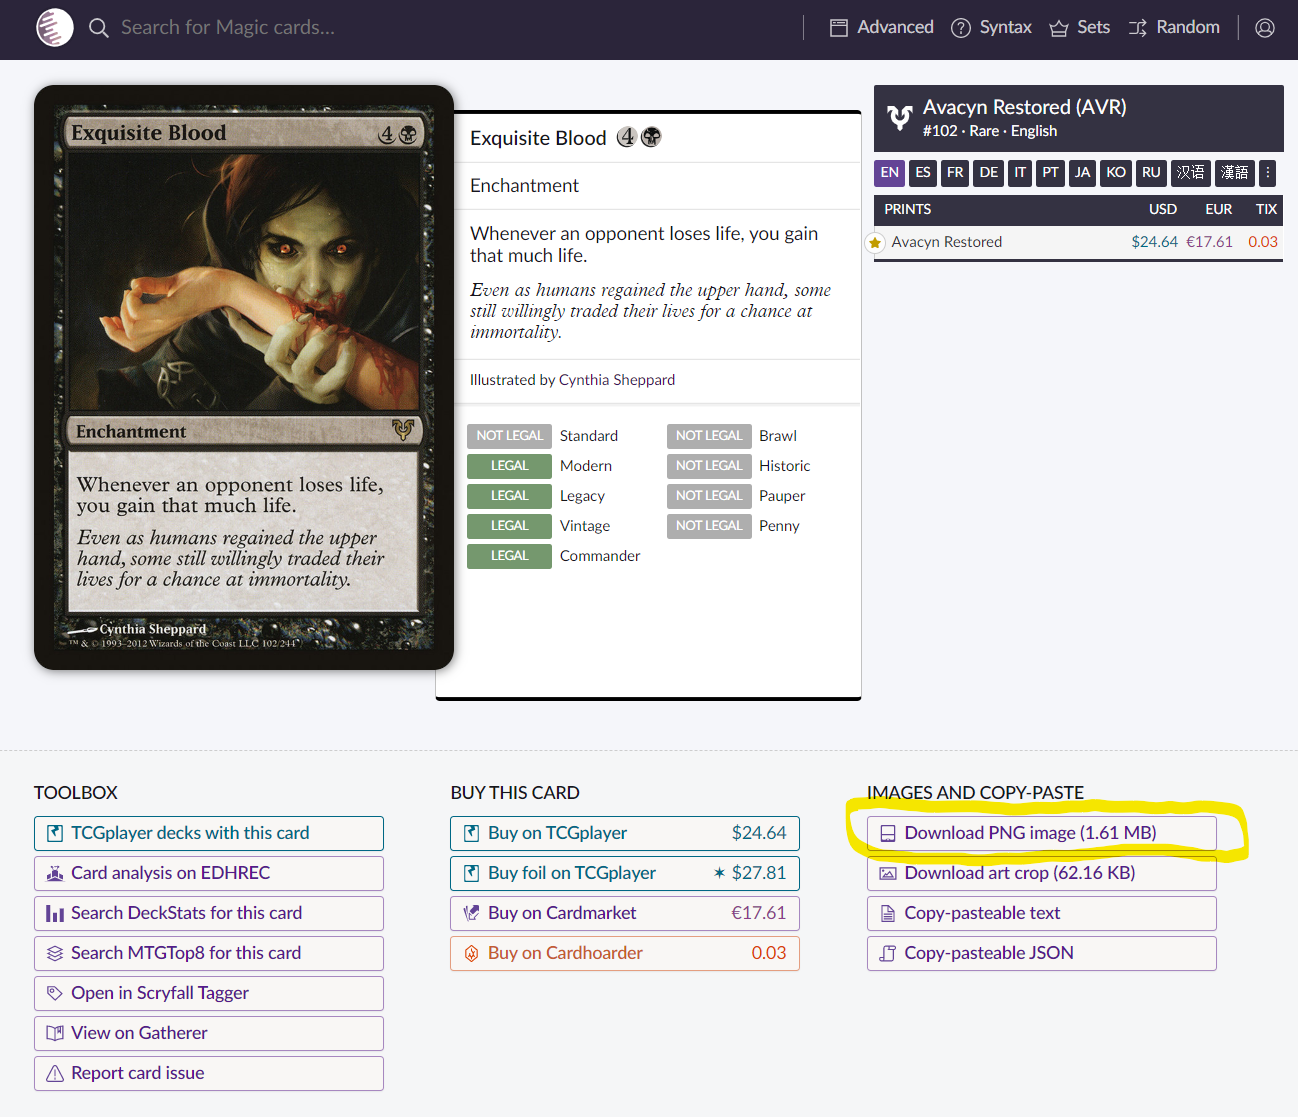
Once you have the document ready it is time to import needed assets to facilitate the creative process. Take the time to look up the card to be altered on Scryfall. It is crucial we use Scryfall. The “behind the scenes” processing and optimization of the sleeve’s art are based on images pulled from Scryfall. We use these images to create a color-matching system for the card so that when we print the sRGB files, they can be adequately converted to printable CMYK without hassling you, the artist, with the process. For this tutorial, we will be looking at an alter of Exquisite Blood. As such, I have gone to Scryfall and looked up Exquisite Blood. Once I found it, I went ahead and clicked on the “Download PNG Image” button on the bottom right-hand side of the website.
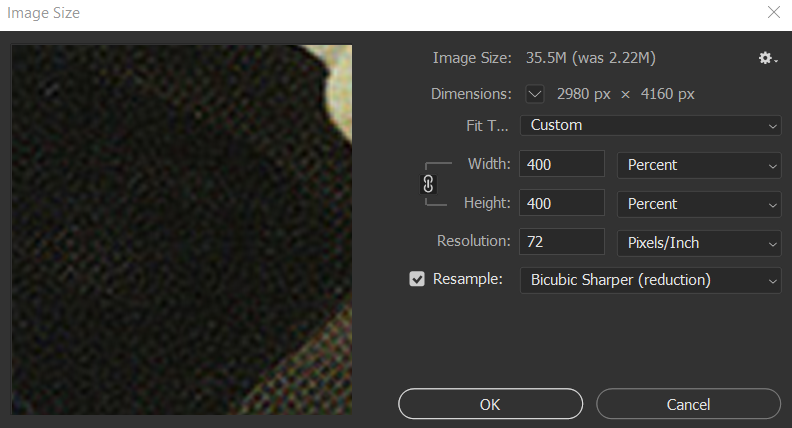
Once downloaded, I need to open this image in Photoshop. Then I want to resize the image for proper scale and size in use for editing. For Alter Sleeves that is 400% the image size, so that it matches the right height and width in pixels as the sleeve. It should be noted this will result in a very large image. If you are working at half-scale, as we talked about above, (300ppi) only resize 200%.
After resizing our image, we can import it into our template. Alter Sleeves offers a variety of templates for quick use and they will work for quite a few of your designs. You can find them here. You are likely wondering why I just had you the document if we already have preexisting ready-made documents? It is very important to know what the document needs to be to make sure there are no errors when we are preparing the end-result. Keeping everyone informed is important. Exquisite Blood is a Modern frame card, Not M15, so I grabbed the Modern Spell Frame. Once you have your frame open, move the base card image into the folder layer called “BASE CARD GOES HERE.” At this point, you have all the base things set up to make alters on the other layers.
Creating the Sleeve

There are two ways to add art/alters to your Alter Sleeve once you have it set up: Design it digitally or add scanned physical art. We will go over both.
An Important Note on Copyright
As we discussed in our IP article; Any submitted sleeve can not contain copyrighted material that we do not own. What this means is that your submitted sleeves can contain any art that you desire within the limits of printable copyrighted material; no portion of any Wizards of the Coast intellectual property is allowed on sleeves. No names, mana symbols, guild symbols, clan symbols, characters, or parts of card art, can be on your sleeve. This includes text and names from any card, for example, you can not reproduce rules text of a card on a sleeve and you can not use words of prominent things from the game. Similarly, you can not introduce characters that we do not own onto alter art, this means adding, for example, Jace to a card is not allowed, even if it is your own personal fan art.
This is to comply with the WoTC fan content policy which you can find here. This also applies to copyright material outside of WoTC’s ownership; for example, you may not put Pikachu on a card even if you made that art yourself. If you would like to reproduce or use Mana symbols in your sleeve, Baerthe has prepared a series of free, open-source, generic symbols you may use instead. They can be found here. Check out the #Artists-Links section of the Alter Sleeves discord for a variety of useful links and templates.
Scanning Altered Cards
To use scanned art in your Alter Sleeve you will need to acquire a high-resolution scan of the altered card you want to make an Alter Sleeve of. This can be done, ideally, by the use of a personal scanner; if you do not have one you can check out a local library, copy shop, college, or FedEx Office, or similar office support store location. Photos or the like are not suitable for this at all, it has to be a high DPI scan, deviation from this can result in very wonky colors, scales, and blurry art. When scanning the alter you want to make sure it is being scanned at high enough resolution or Dots-Per-Inch, this is how a digital computer interprets the physical image to pixels which make up digital displays, to assure this, the image is being scanned in at least at 600dpi and in TIFF or another uncompressed format. PNG, PDF, and JPEG will not be suitable in quality as they add in compression artifacts.
Once you have the newly scanned file, open it up in photoshop. You may need to adjust the image size to proper dimensions by cropping it or rotating/scaling the image. Create a new document as we did at the start of this tutorial (2980x4160 pixels, DPI of your choice, but 600ppi will help with the large scanned image). Then import your scan into this document and resize/crop to shape. Then you will need to add transparency to the image by masking out or erasing the corners of the alter and the boxes, etc. This can be done by importing it into one of the templates above. No part of the original printed card may be part of your sleeve. Sleeves that contain parts of any printed card or anything from another media source are not allowed to be submitted and will be rejected from the site.
Again, try to align the card image in Photoshop, as precisely as possible, and crop precisely around the card edges. Once you have this you can follow the steps above and prepare your document for alters. Then import this edit the scanned image into the Art folder of the template. Once we have the image imported, we will need to color correct it to make sure it matches the base card. This is because scanning isn't perfect to replicate colors. Color correcting takes time and practice to get down, please watch this short tutorial on how to write it out is beyond the scope of this tutorial.
Digitally Creating Sleeves
Making a digital alter is pretty much the same as making a scanned/painted alter. The change comes in how it is performed, which is digital. Basically, just make a new layer in the prepared template and go to town. For things like border extension, you can copy the card’s base art into a new layer and use altering tools like copying colors to extend forms but make sure to not copy elements directly of the art. It should also be noted that the use of the cloning tool to directly copy elements of a card is not allowed at all and repeated violations of this could get you removed from the site. When creating a digital alter it is best practice to use more than one layer and embedding objects or internal documents into the photoshop file. For example, the Exquisite Blood alter mentioned above has over 40 layers, one layer for each object and layers for color and filtering.
Important Information About Editing

Masking Layers
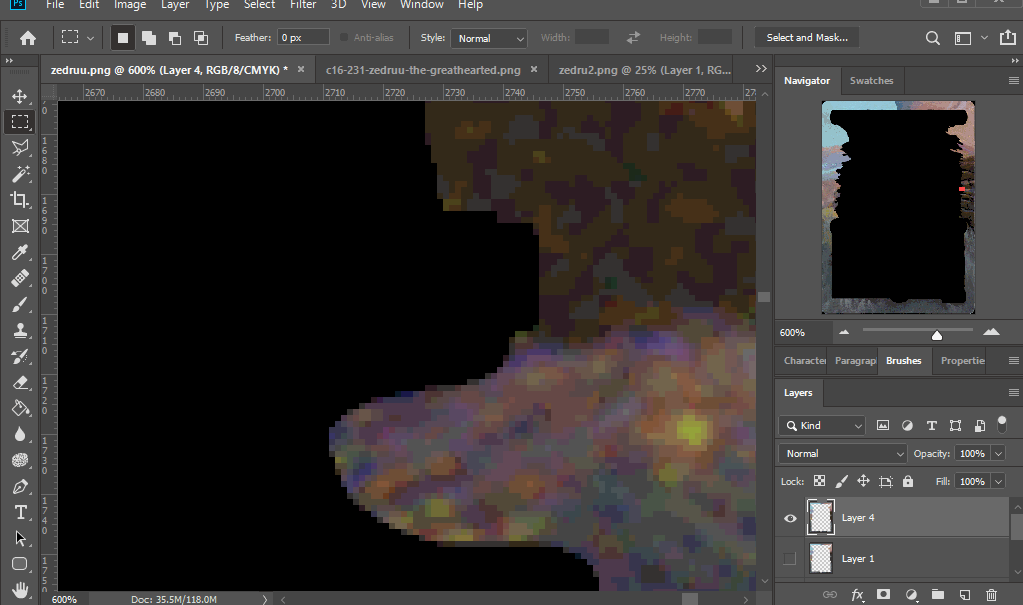
We will go over in-depth what are masks and layers in our next article, but to get you started: because we can not simply just print the whole alter, you need to remove parts of the scan that are not the alter, in other words, the parts of the card you did not alter and should not be a part of the sleeve. This can be done in a variety of ways, however, the least destructive way is to create a masking layer of the altered image. Masks are a black and white image that tells Photoshop how and where to apply transparency to an image. However, sleeves can only have absolute opacity. This means you can not have any pixels present in the sleeve that are not either 100% opacity or 0% opacity, there can not be partial opacity on any pixels.
Once we add a masking layer to our sleeve we need to keep in mind that it can not be blended or have partially opaque pixels in the alter. You can avoid this by turning off Anti-Aliasing in your tools and using the pencil tool to edit masks. To learn more about masks, see here. If you use GIMP, please see their website. The templates listed above have pre-cut masks at the bottom of the file. CTRL+click (⌘+click for mac bros.) on the MASK image while using the marquee tool to actively select it. You can then apply these active selections to a masking layer on the alter to cut out parts quickly and easily. Setting your layers to “dissolve” also removes all opacity from them, instead of creating a randomized spread of dither. It is also possible, once the sleeve is finished, to use the selection tool to force total opacity. By loading the selection and inverting it, then deleting, you remove all non-total opacity on pixels.
Check and Save
Basically, once the alter is in the template, color corrected if needed, and masked out, it is ready for your last check:
The image size is 2980 x 4160 pixels.
sRGB ICC is being used.
The corners should be correctly cropped to the card frame.
If there is blending, it must be dithered and have absolute opacity.
The opacity in your design is either 0% or 100% for each pixel to prevent unwanted white spots when printed. Check out this specific tutorial for more info by Michel Mohr for info about this and dithering.
No NSFW alters.
Save the file and export it to PNG.
Importance of Good File Naming and Saving Schemes
There are many different file naming conventions and there isn’t a “right” way, but you need to include the elements that are important to your own workflow. The following list contains some elements that many designers find helpful in file names. Pick the ones that you think would help you identify the file more easily:

Client name, initials or last name (e.g. JohnDoe)
Client’s brand (e.g. JDBrand)
Name of client’s campaign (e.g. SummerCampaign)
Channel within that campaign (e.g. blog)
Component needed for channel (e.g. image)
Date (e.g. 2019_05_30)
Version number (e.g. v01)
Card and Set name
For the purpose of Alter Sleeves, we often recommend a combination of these, to help you organize your documents. If your file name is too long, it tends to get truncated when displayed. This truncation varies between operating systems and devices, so there isn’t a set number of characters. Your goal then is be as concise as possible. With shorter names, you will be able to see the full file name easily. They are easier to type when you’re communicating with others, and faster to scan when you’re in a hurry. With shorter names, however, you will likely need more project folders and folder levels to provide the additional information not included in the file name.
Creating Set of Sleeves

Sets can be created after you have uploaded all of the singles that belong in the set by going through the process, written above. On the left side of your dashboard, there will be a link that will send you to the correct page.
To create a set, take the following steps on that page:
Set name
Give your set a name. This does not necessarily have to be unique.Select what kind of set you are creating (for example 3-Basic Land)
Select a design by looking for the design name for each spot in the set that opened up.
Put in a Bounty Code, if it's applicable. This field will not be mandatory.
Please note: There will be an option added in the near future that will allow you to add lands to sets more easily based on their frame only.
Related Articles
How do I set up and use Discord?
How do I set up and use Discord? And What about the AS Server? Under 6 Minute Read. In this article we cover what actually Discord is and how we use the Alter Sleeves Discord server. What is Discord? Basically, Discord is a free application. It ...How do I use the search functionality on the website?
There are multiple ways to search the Alter Sleeves website for the design you would like to order. You could go to an alterist profile to find all the designs of your favorite alterist, look through designs and and sort those by set, go to our set ...How do I use the credits on my account?
If you have any credits on your account, you must use those up before it is possible for you to order Alter Sleeves with currency. On your personal dashboard, you will be able to see how many credits there are associated with your account. If you ...Can i use AI generated artwork in my submissions?
The short answer: No. Alter Sleeves is a platform that intends to respect and celebrate the hard work made by artists who have poured years of work into their craft, to allow AI generated work to be submitted opens the floodgates for our platform to ...How do I use TransferWise?
On the 26th of each month, you will receive an email from TransferWise stating that your funds are on their way. If you have a TransferWise account, your funds will be deposited directly into your account and can be used immediately. If you do not ...